

Gingerbread houses have been a tradition in our house since my now 16 year old son was barely 3 years old. Every year he and I would decorate a house together - eating way more candy than ever went onto the structure. We made some great memories during our gingerbread "experiments" I call them that because they were not always structurally sound houses that could support the weight of the massive amounts of frosting and candy that we piled onto them. There were a couple of years when we ended up with an unidentifiable heap of gingerbread and sugary sweets covered in sticky white frosting. We were never too disappointed in our gingerbread catastrophes though because the fun was in the making. (and the sampling of course.)
Over the years, I have learned a few things about making Gingerbread houses that can stand up to the test - not to mention the weight of the decorations. I think we made every mistake in the book so it was mostly figuring out what NOT to do. I've compiled a list of the things that I did wrong when building my gingerbread house so that when you make your gingerbread house - you won't make the same mistakes that I did.
1. Make and bake the gingerbread at least one day before you want to assemble your house. (I have learned to make my houses in November and store them in the freezer until we are ready to assemble.)
2. Use a cardboard cake circle to set the house on so that it can be moved once it's complete. (It seems obvious but I've ruined more than one trying to move a finished house.)
3. Go through the leftover Halloween candy and use it to decorate the house. (A great way to use up unwanted candy.)
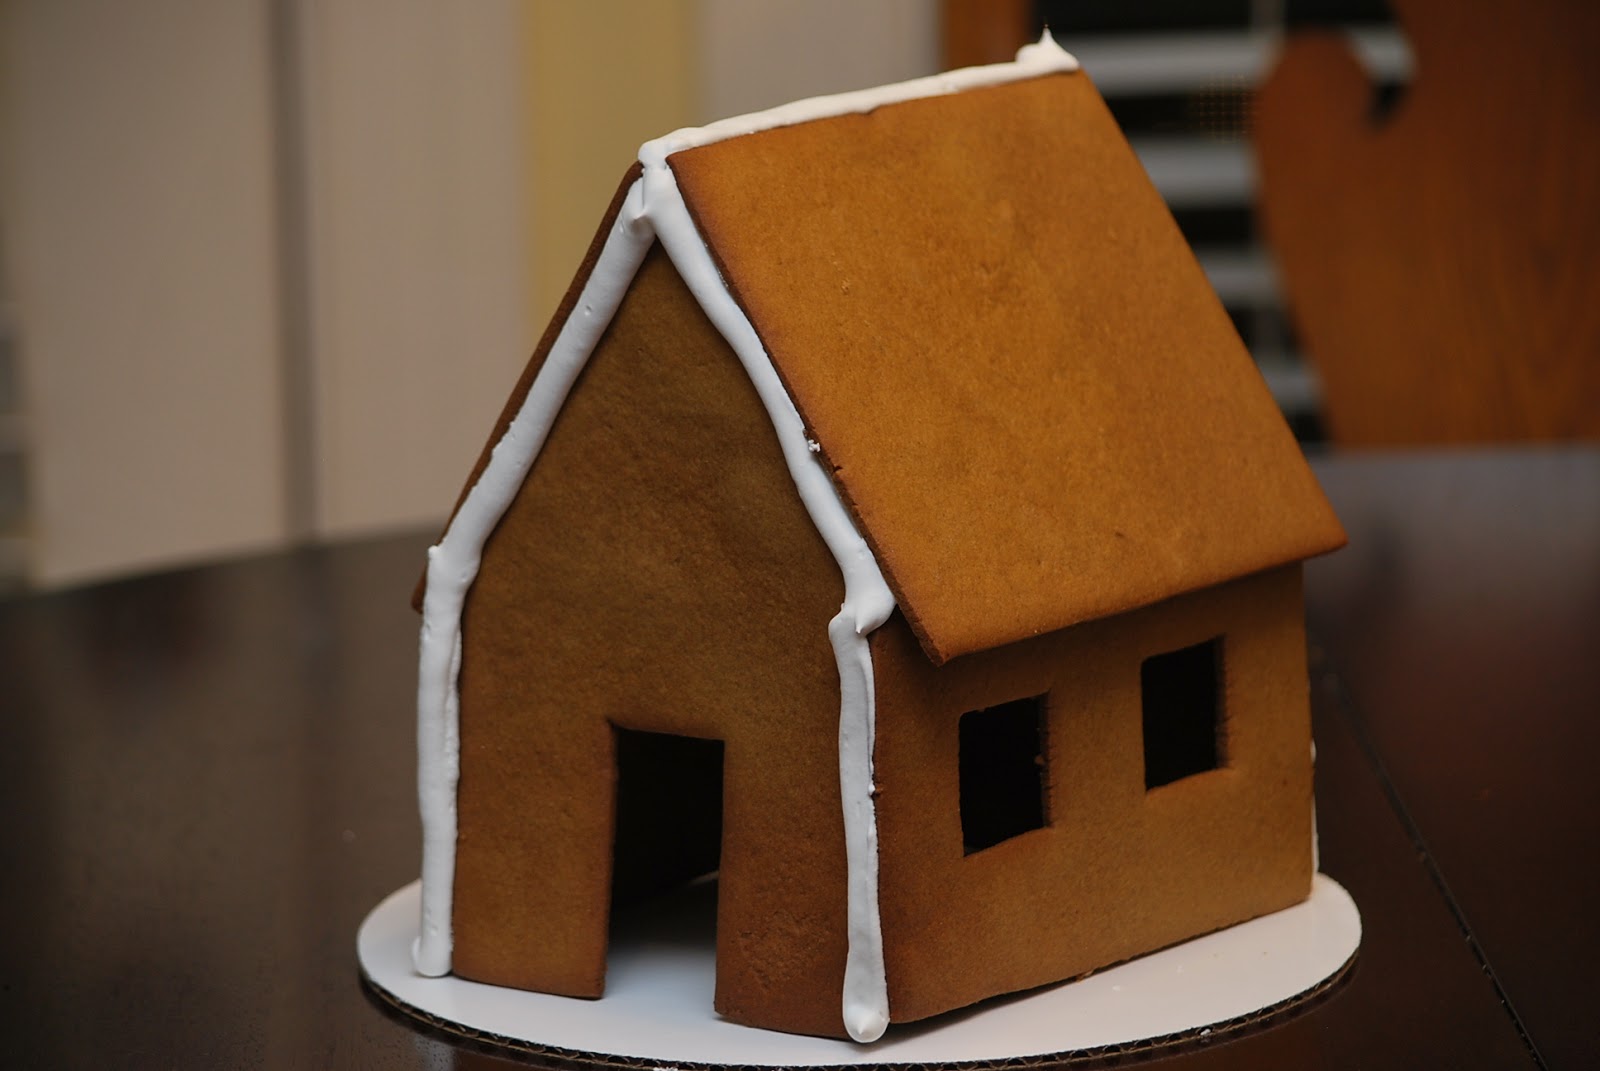
4. Cut doors and windows in the gingerbread - before it is baked. (And ALWAYS make extra pieces to account for any broken gingerbread pieces.)
5. Put the house together with icing at least 2 hours before you start to add candy or any decorations.
6. Never, and I do mean never, leave the gingerbread house on the table where it might be accessible to a Weimaraner.
Last year I made tiny gingerbread houses to sit on the edges of our hot chocolate mugs.

This year I decided to change it up again and make slightly different houses. I found a gingerbread recipe and a printable pattern on Bon Appetit that caught my eye. Of course, their houses are decorated much more professionally compared to the architecturally unsound structures covered in coconut "snow" that end up adorning our dining room table over the Christmas season. (I'm willing to bet that they didn't have nearly as much fun putting their house together as we did though.)

I adapted the Bon Appetit recipe slightly and I will give you my version of it. If you want more detailed instructions on gingerbread house building, I suggest that you check out their website as well.
Gingerbread House Dough
Ingredients
6 3/4 cups all purpose flour
4 1/2 teaspoons ground ginger
1 1/2 teaspoons ground cinnamon
1 1/2 teaspoons baking soda
1 1/2 teaspoons salt
3/4 teaspoon ground cardamom
1 1/2 cups solid vegetable shortening
1 1/2 cups sugar
3 large eggs
3/4 cup robust (dark) molasses
Preparation
Sift flour, ginger, cinnamon, baking soda, salt and cardamom into medium bowl. Using electric mixer, beat shortening in large bowl until fluffy.

Add sugar and beat to blend.

Beat in eggs 1 at a time.

Add molasses and beat on high speed until well blended.


Add dry ingredients in 4 additions, beating at low speed until dough forms.
Divide dough into 2 pieces. Flatten each piece into rectangle. Wrap each in plastic and refrigerate until firm enough to roll, at least 6 hours.

Roll each piece between 2 silpat baking mats to 1/8 inch thick.

Cut template out of paper and lay on top of dough. Trace around pattern with a sharp knife and remove excess dough. (Never try and move a piece of the house.) This particular pattern had a front and a back to the house, 2 sides and 2 roof sections.

Once the scraps are removed, place the mat onto a baking sheet and bake 13 minutes at 350.

I like to make my gingerbread fairly brown and crispy. You definitely don't want soggy or undercooked dough when it's time to assemble your house. I like to lay all of my pieces out on the counter to cool completely.


Once the gingerbread is cool, I put all the pieces for 1 house in a large ziploc bag and put it in the freezer. (Frozen gingerbread is very brittle so be extra careful when taking it out of the freezer.)

Mix together a batch of royal icing. Assemble houses and let dry completely.


Let the decorating begin!


My kids each decorated their own house, Ben and I worked on a house together and my parents even made a gingerbread house.


Things got a little messy along the way.

This is my daughter's house...


quite impressive, don't you think? This was my son's house...


very creative. This is the house that my parents made...


a piece of art - if I do say so myself. Then...Ben decided to add lights to the house and this is what happened next...


 So ... it became a snack.
Well, three out of the four houses survived and now adorn our dining room table for the Christmas season.
Ciao!
No comments:
Post a Comment